As your toddler continues to grow and develop, so does our need as parents to adapt to their needs. Learning how to adapt to a mobile toddler comes with so many challenging types of changes to our mindset and environment. And figuring out how to safely (and cleanly) change a diaper standing up is one of them. With my step-by-step approach to learning how to change a diaper standing up, a little extra patience, and practice, you’ll be changing diapers standing up in no time!
How to change a diaper standing up
Learning how to change a diaper standing up may sound complex, but it’s more simple than you think.
Why change your toddler standing up?
Changing your toddler’s diaper standing up can signal the beginning of a new phase of toddlerhood. Standing diaper changes are the first step in your child’s journey from being a passive bystander to an active participant in their pottying process. It truly is the first step of potty training.
Toddlerhood is surely a time when toddlers begin to demonstrate their independence. And with that, can come their resistance to diaper changes, which can lead to power struggles. Although this resistance can feel frustrating to parents, it is actually developmentally appropriate, normal, and healthy for toddlers.
Rather than showcase your frustration at their lack of interest in laying down during a diaper change, try to embrace their growing development and desire to explore. These are all wonderful cues that you can learn to accept and adapt to, as a way to help them progress their natural tendencies to potty train.
Signs your child is ready for standing diaper changes
Sometime between 9 to 15 months old, most kids start to push back on and even refuse diaper changes lying down. Paying attention to your toddler’s gross motor development as well as their natural curiosity of exploration are all healthy signs that your child is ready for the next stage of diaper changing.
Instead of getting into a power struggle or handing them your phone for distraction, look at how to meet your child’s needs within your boundaries. Your child’s protest is communicating that they are ready for something new. This is a wonderful opportunity to work together with your toddler to meet them where they are in their development.
7 simple steps to change a diaper standing up
Follow these tips to help make changing a diaper standing up efficient for both you and your toddler. Don’t forget to check out all of my Amazon Potty Training Essentials for more of my favorite recommended products.
As an Amazon Associate, I earn a small commission from qualifying purchases at no extra cost to you. This does NOT impact my recommendations as I only recommend products I believe in. Thanks for supporting Transforming Toddlerhood in this way.
Step 1: Choose a safe space
Go into a space where your toddler can’t run away. Since your child is likely to move around during a standing diaper change, make sure you are in a safe room or area that is child-proof. The bathtub is a great option for stand-up diaper changes, especially poopy diaper changes. It offers a contained, stable, and easily wipeable space, which is a win on all fronts!
Step 2: Create an interesting place to stand
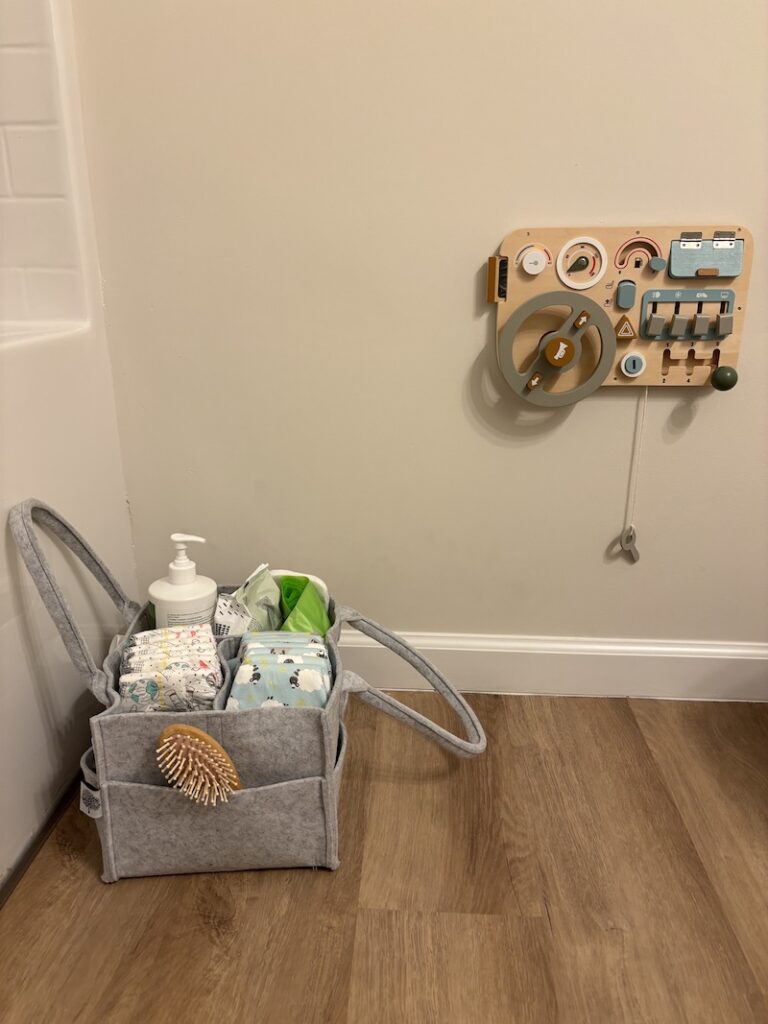
Keep your active toddler contained and distracted by creating a surrounding space that grabs their attention. Attach a busy board to the wall or suction cup spinner to the bathtub. If you don’t have these items accessible, having a basket of toys available to keep them busy during the diaper change will work just fine.
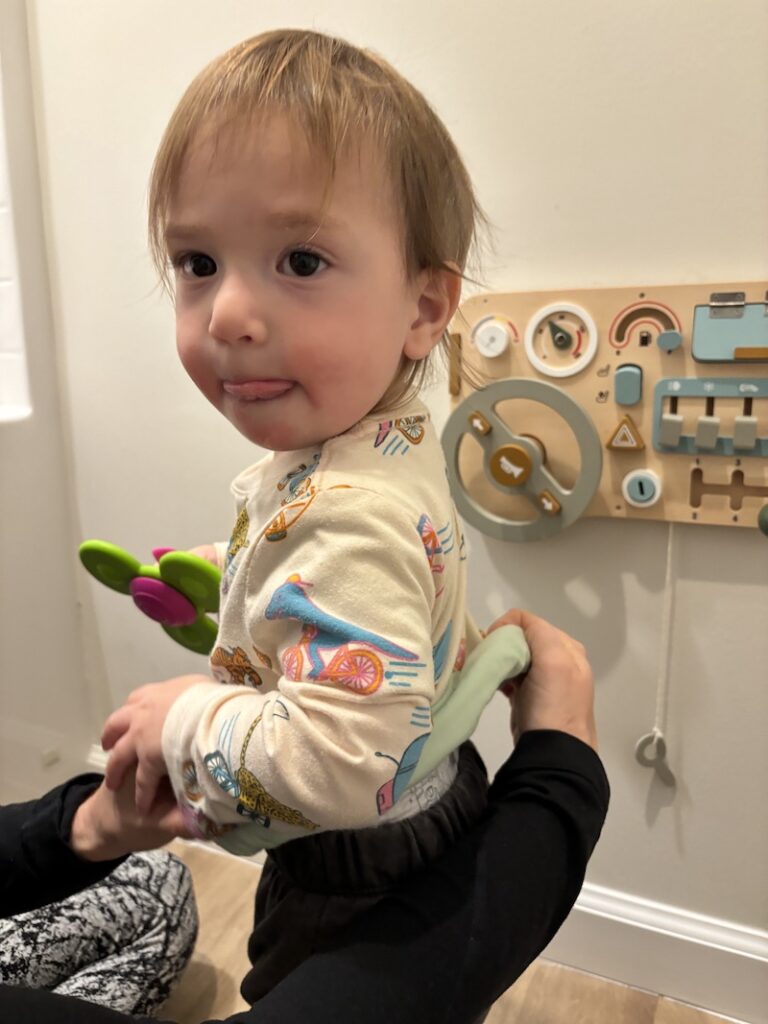
Step 3: Prep your supplies
Don’t stress if you don’t have everything you used to use at your baby’s changing table. You don’t need all the supplies you used to use for newborn changes, frankly, you don’t even need diaper pails. You just need a simple plastic bag for soiled diapers, baby wipes, and diapers. I love this diaper caddy to keep everything organized. Be sure to open the diaper and fan out the ruffles in advance.
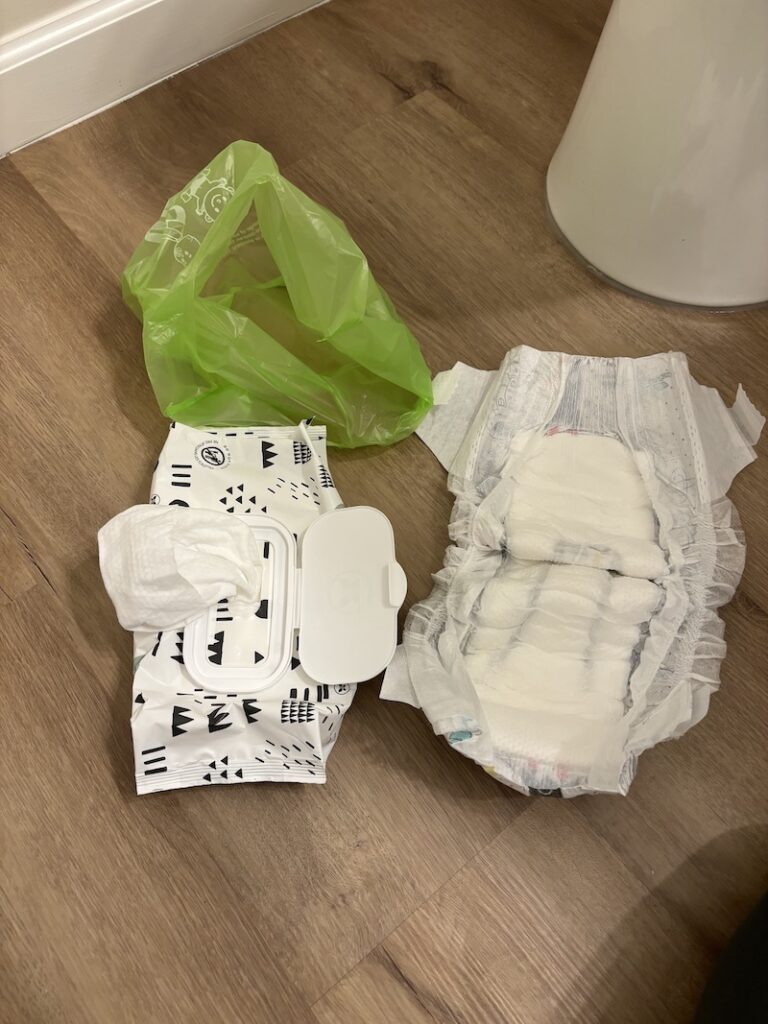
Step 4: Rollup up your child’s shirt and pull down pants
I like to start by pulling down down their pants. I often take them completely off. Don’t forget to roll up their shirt or onesie. I roll it several times. This is a vital step so it doesn’t get in the way once you take off the diaper!
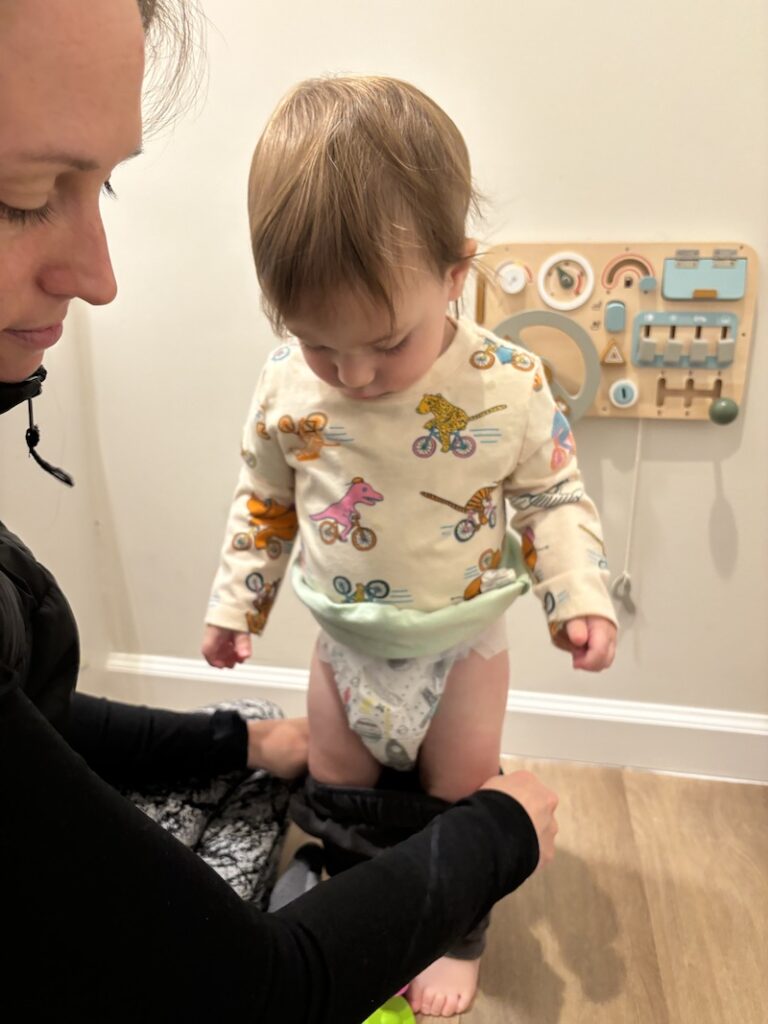
Step 5: Take off the diaper and clean your child
Here’s where we get down to business. Try to make this step as quick and efficient as possible. Remove the dirty diaper or wet diaper. Make sure you wipe from front to back on your baby’s bottom for proper hygiene practices. It may seem tricky at first, but with a little prep work and practice, you will have this down in no time.
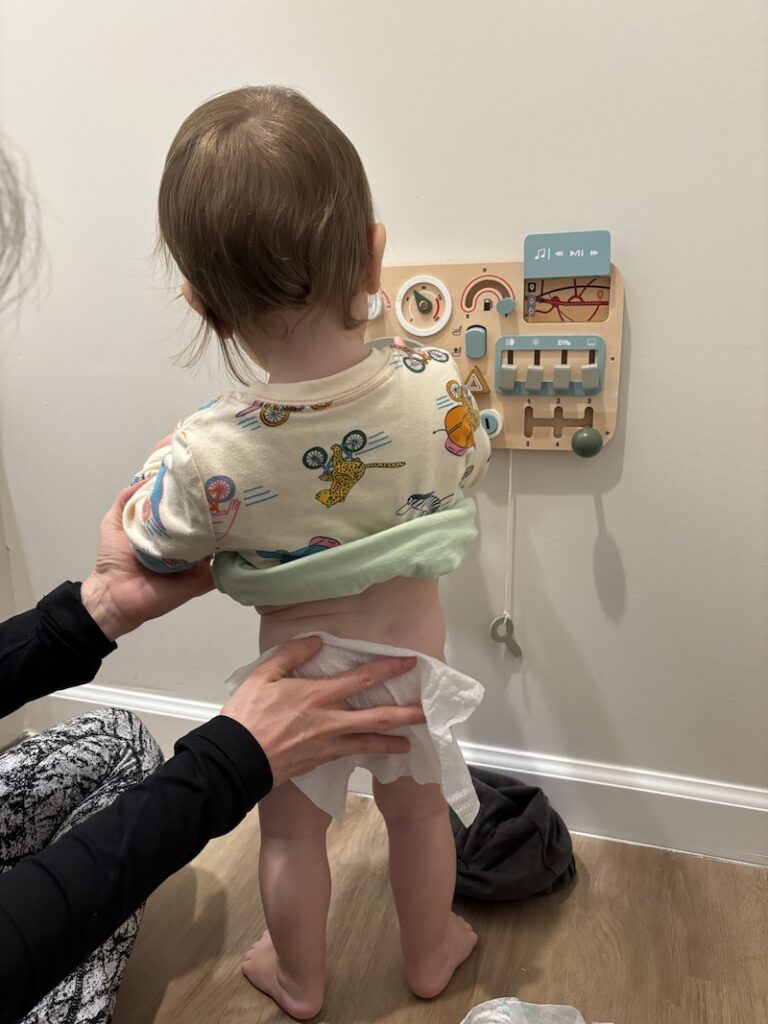
Step 6: Put on the fresh diaper
Make sure your clean diaper is close by. Apply diaper cream if needed first. Then, whether you use disposable diapers or cloth diapers, fasten the front of the diaper. Attach one side first (doesn’t have to be perfect), just make sure it’s holding the diaper in place so that you can quickly attach the second side. You can then easily go back to readjust the first side.
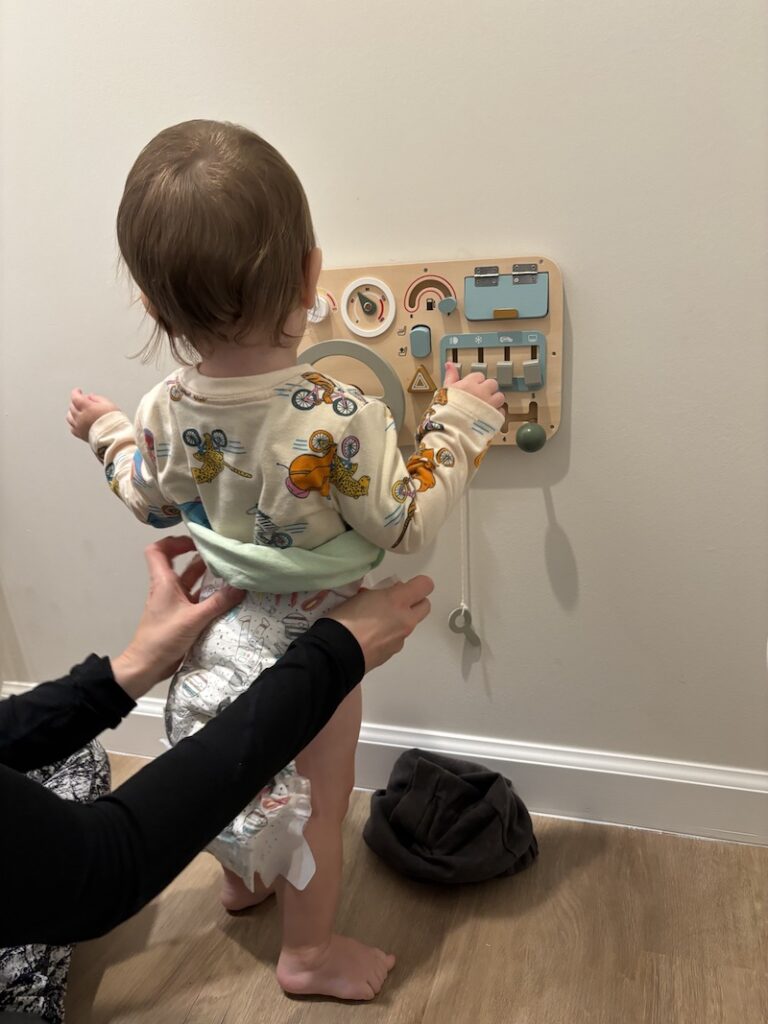
Step 7: Teach your child independent skills
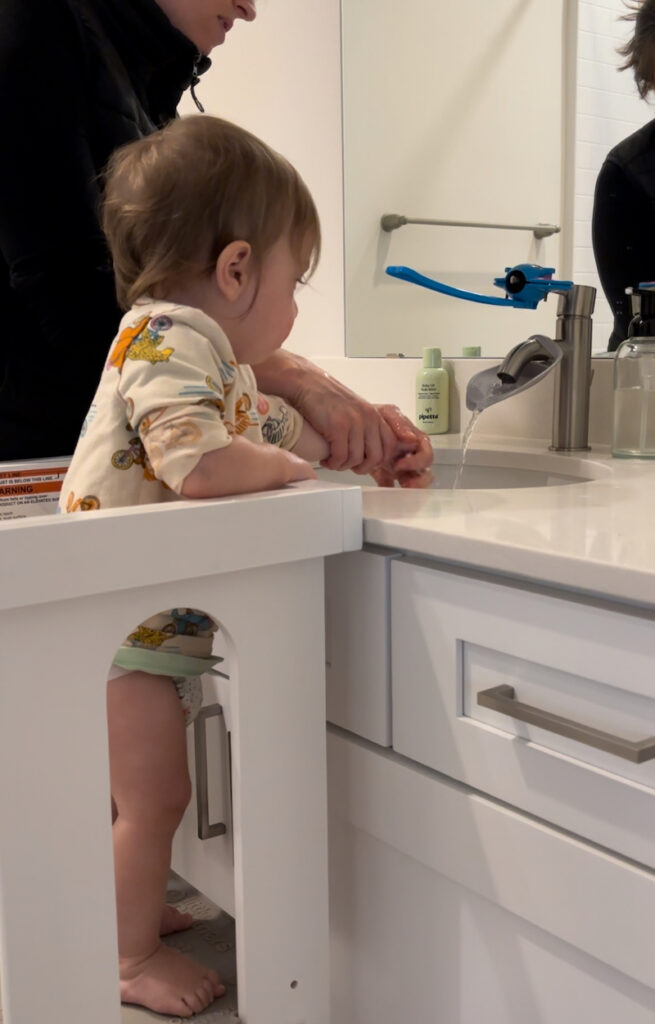
As we mentioned above, standing diaper changes are the start of potty training. Get your toddler involved and excited with the process. This is a great time to start teaching them how to pull up their own pants and wash their hands independently (by demonstrating how you wash your hands). These skills are precursor skills to potty training. Some of our favorite products to help build independence and confidence with potty training are these genius faucet extenders and well-built step stools.
What about poop?
Most people are afraid of standing diaper changes because of poop. The idea of poop getting everywhere is enough to make some parents completely avoid standing diaper changes altogether.
But the truth is, poop rarely goes somewhere other than a diaper or wipe. When possible, change diapers standing up in the bathroom where the floor is easily wipeable. Also, having your child sit on the toilet with a seat reducer can be an easy solution to avoiding any potential mess. Alternatively, you can have your child do downward facing dog yoga pose which make it easier to clean their bottom.
Don’t be afraid of stand-up diaper changes
If your toddler is on the move, you may be struggling with how to conquer those dreaded diaper changes. Sadly, the days of placing the diaper under your baby while they patiently lie on their backs to be changed is becoming a distant memory. Needless to say, the skill of diaper changing that we develop comes with both practice and circumstances.
If you still have questions or are feeling overwhelmed with keeping up with your toddler, don’t miss my toddler parenting classes. I’m here for you every step (and diaper change) of the way.
Frequently Asked Questions
You can start changing your toddler standing up as soon as they can hold onto something sturdy enough to stand up. The bathtub is a safe, stable, and contained space for stand-up diaper changes. We began standing diaper changes around 11 months with my child; even though he was not walking yet, he was refusing to lie down.
Putting on a diaper while standing up is easier than you think. Fan out the diaper ruffles, attach the first side, attach the second side, and then readjust the first side. It takes practice (and patience)!
There are so many benefits to standing diaper changes. One of the most notable benefits is that they can minimize power struggles that can come along with diaper changes. Adapting to standing diaper changes is the first step towards toilet learning and independence.



Leave a Reply